Bitbucket
This document only pertains to Code Climate organizations created prior to January 2018. We are currently not accepting any new non-GitHub repositories.
Code Climate supports Bitbucket-hosted repositories. This article explains the setup process.
You can add both private and public Bitbucket repositories to Code Climate. However, all Bitbucket repositories must be added to Code Climate organizations, which requires a paid plan. This means if a repository is open-source in Bitbucket, it will be private in Code Climate.
You must be in an organization's Owners group to perform the actions described in this article.
How To
- In Bitbucket, from your repository's Overview page, locate the URI in the top-right corner and change the protocol selector to SSH. Copy the URI to your clipboard.
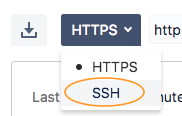
We do not currently support HTTPS for Bitbucket-hosted repositories.
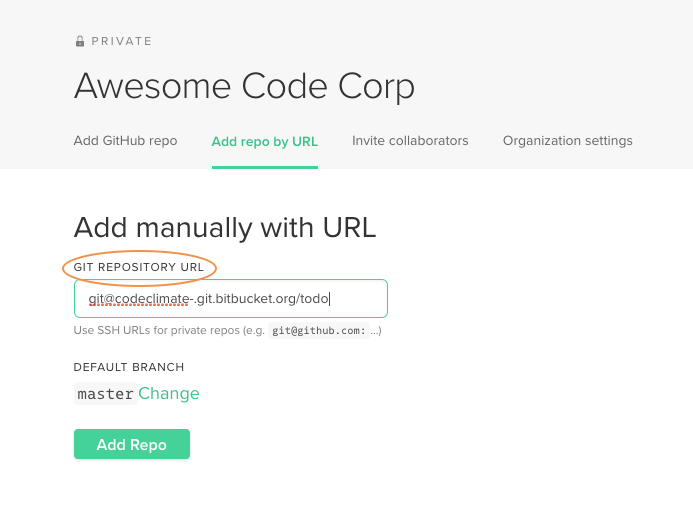
- From your Code Climate Dashboard, within the organization you want to add the repository to, navigate to the URI text box.
Tip: In most cases, you can get to this text box by clicking Add Repo, then clicking Manually add a Git repo by URL. That said, in other cases, the click-by-click process may differ. While navigating, you may be prompted to enter an organization name.
- Enter the repository's URI.
- Optional: If you don't want the branch named master set as the default branch, click Change and enter a different branch name.
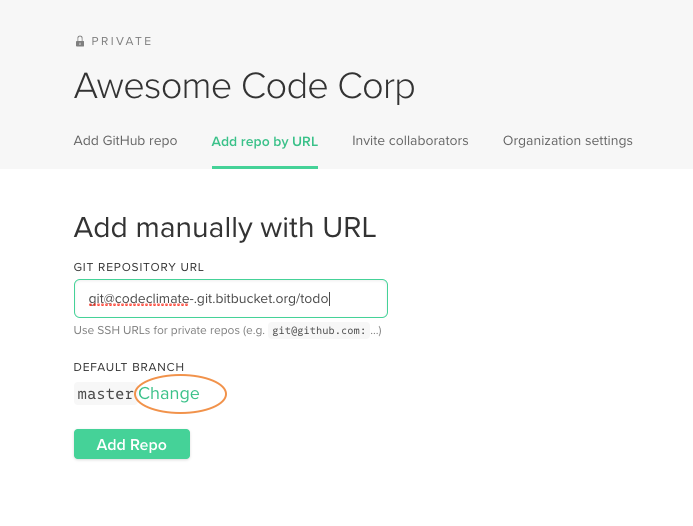
- Click Add Repo.
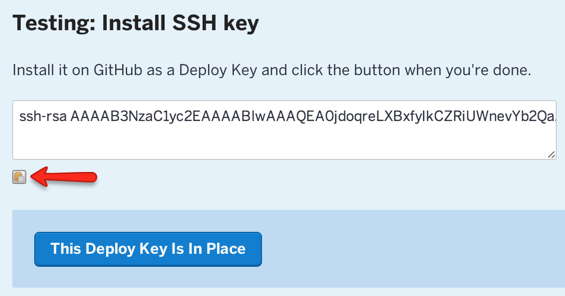
- Click the "copy to clipboard" icon to copy your new public SSH key to your clipboard.
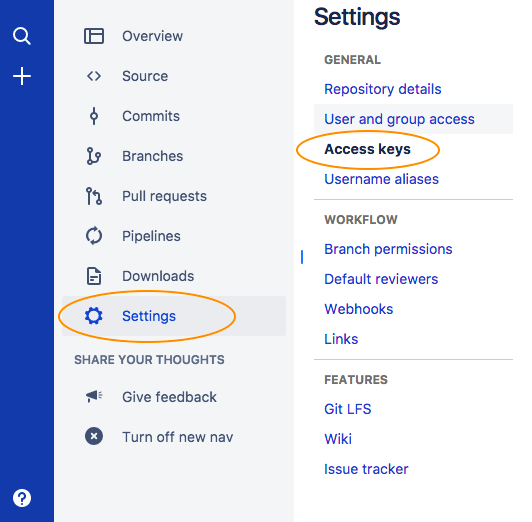
- Back in Bitbucket, click Settings, then select Access Keys.
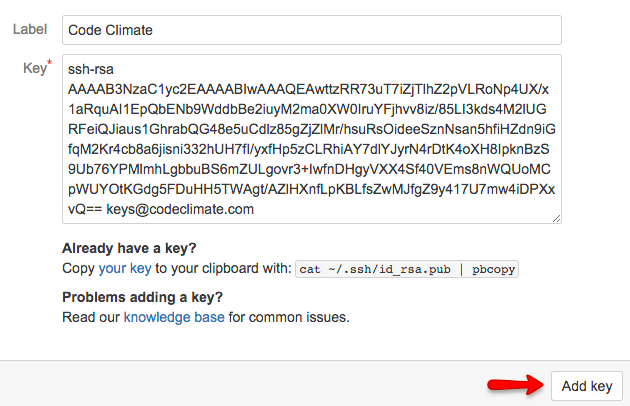
- Click Add Key.
- Enter a Label for the key, and paste the SSH key into the Key field.
- Click Add Key.
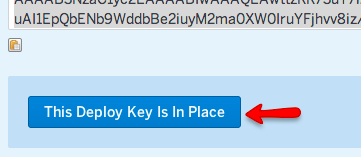
- Back in Code Climate, click This Deploy Key Is In Place.
- Code Climate will begin analyzing your repository right away. You'll see a "processing" indicator until our analysis is finished (which is usually within 5-15 minutes). Your Feed page will be empty until there's a new commit for us to review and until we find something worth telling you about.
Webhook
To complete your repository setup, you'll want to install our webhook. This hook is what notifies us of certain events happening in your repository, including commits made to your default branch. When we receive the notification, we'll run a new analysis on the spot.
If you don't install our webhook, we'll check for new commits on a poll.
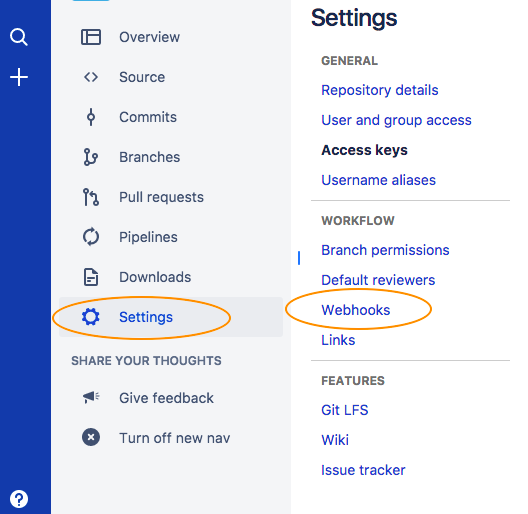
- From your Bitbucket repository's Overview page, click Settings in the left navigation.
- Click Hooks.
- Type POST into the Select a Hook field and click Add Hook.
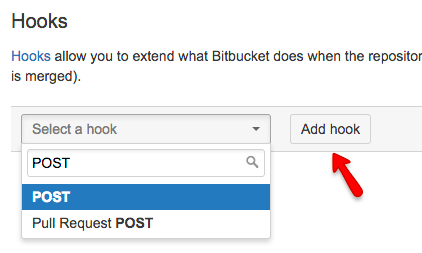
- Paste the following into the URL field: https://codeclimate.com/api/repos/repo_id/refresh?api_token=api_token. In this URL:
- Replace
repo_idwith the ID listed in the browser's URL bar when viewing the repository Feed page. - Replace
api_tokenwith the token listed in the organization's Settings menu, in the Integrations tab. When looking for this token, ensure you are not viewing a repository’s Integrations tab -- since API tokens live at the organization-level, it is accessed in your organization’s Integrations tab.
- Click Save. Your Bitbucket repository will now trigger a new analysis automatically each time you push a commit to your default branch.
Pull Requests
Pull Request integration is only available for Bitbucket Server and Code Climate: Enterprise users.
In addition to automatically analyzing your default branch in Code Climate with a post-receive hooks, you can also configure Code Climate and Bitbucket to automatically analyze pull requests and post back with information about the issues fixed or introduced.
To set this up, you will need to have admin permissions on Bitbucket or find someone who does. Then, navigate to the Atlassian Marketplace.
Install the Pull Request Notifier Add-On
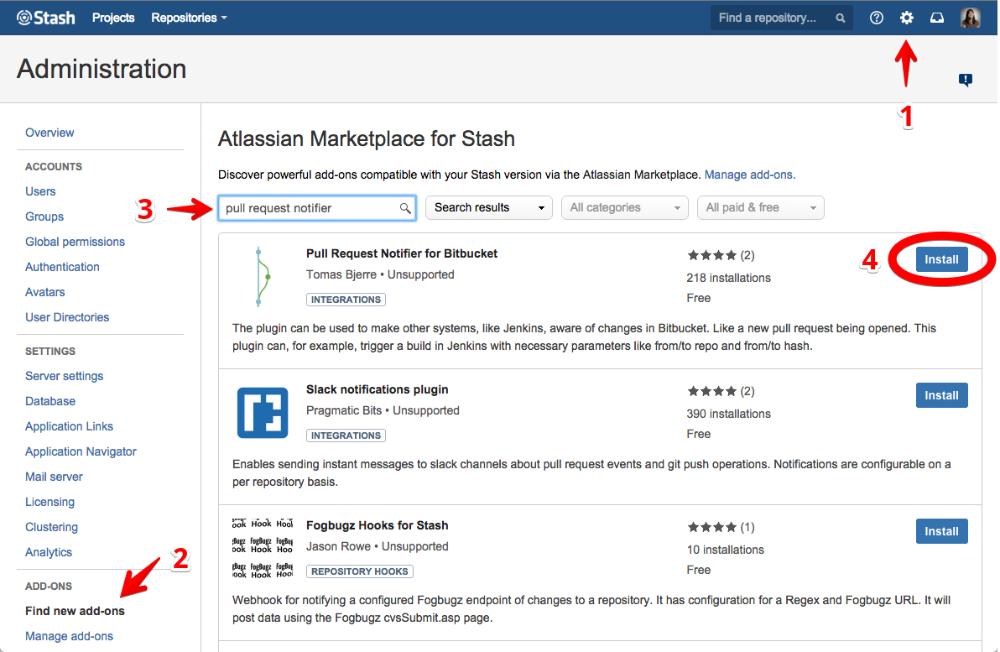
Configure the Pull Request Notifier Add On
After the installation is done, click the "Manage" button (formerly "Install"). Then, click "Configure" under the "pull-request-notifier-for-stash" add-on.
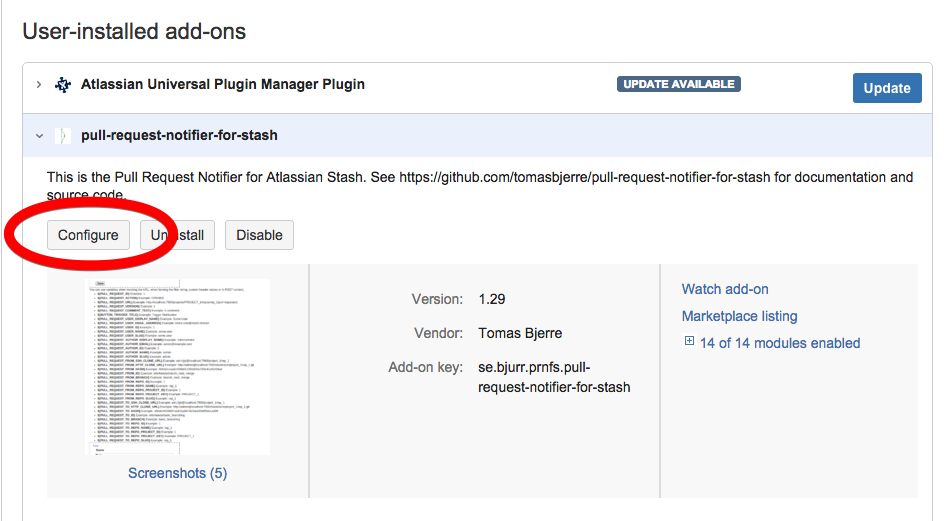
In the resulting page, there should be a form that allows you to configure a trigger. Set up the trigger like so:
Name: Code Climate
Triggers: Check all options
Headers:
Name: X-Atlassian-Token Value: no-check
Name: X-Stash-Event Value: pull_request
Invoke URL: https://{YOUR_CODE_CLIMATE_HOST}/webhooks
Replacing YOUR_CODE_CLIMATE with the hostname for your Code Climate instance
HTTP Method: POST
POST Content:
payload[id]=${PULL_REQUEST_ID}&payload[action]=${PULL_REQUEST_ACTION}&payload[url]=${PULL_REQUEST_URL}&payload[version]=${PULL_REQUEST_VERSION}&payload[author_display_name]=${PULL_REQUEST_AUTHOR_DISPLAY_NAME}&payload[author_email]=${PULL_REQUEST_AUTHOR_EMAIL}&payload[author_id]=${PULL_REQUEST_AUTHOR_ID}&payload[author_name]=${PULL_REQUEST_AUTHOR_NAME}&payload[author_slug]=${PULL_REQUEST_AUTHOR_SLUG}&payload[from_ssh_clone_url]=${PULL_REQUEST_FROM_SSH_CLONE_URL}&payload[from_http_clone_url]=${PULL_REQUEST_FROM_HTTP_CLONE_URL}&payload[from_id]=${PULL_REQUEST_FROM_ID}&payload[from_branch]=${PULL_REQUEST_FROM_BRANCH}&payload[from_repo_id]=${PULL_REQUEST_FROM_REPO_ID}&payload[from_repo_name]=${PULL_REQUEST_FROM_REPO_NAME}&payload[from_repo_project_id]=${PULL_REQUEST_FROM_REPO_PROJECT_ID}&payload[from_repo_project_key]=${PULL_REQUEST_FROM_REPO_PROJECT_KEY}&payload[from_repo_slug]=${PULL_REQUEST_FROM_REPO_SLUG}&payload[to_ssh_clone_url]=${PULL_REQUEST_TO_SSH_CLONE_URL}&payload[to_http_clone_url]=${PULL_REQUEST_TO_HTTP_CLONE_URL}&payload[to_hash]=${PULL_REQUEST_TO_HASH}&payload[to_id]=${PULL_REQUEST_TO_ID}&payload[to_branch]=${PULL_REQUEST_TO_BRANCH}&payload[to_repo_id]=${PULL_REQUEST_TO_REPO_ID}&payload[to_repo_name]=${PULL_REQUEST_TO_REPO_NAME}&payload[to_repo_project_id]=${PULL_REQUEST_TO_REPO_PROJECT_ID}&payload[to_repo_project_key]=${PULL_REQUEST_TO_REPO_PROJECT_KEY}&payload[to_repo_slug]=${PULL_REQUEST_TO_REPO_SLUG}&payload[pull_request_title]=${PULL_REQUEST_TITLE}&payload[from_hash]=${PULL_REQUEST_FROM_HASH}
Updated about 7 years ago
